
You know what I love? iPhones and iPads.
iPhones can be so helpful. Personally, I use mine all the time to make life easier. I check my email on my phone, do most of my shopping, edit blog posts, stay organized with my calendar and read books. I use apps to track how often I nurse baby girl, to order groceries, to edit photos, to check the daily report of my kids’ behavior at school and even to change the channel on the tv. (I know this sounds lazy but our remotes always go missing).
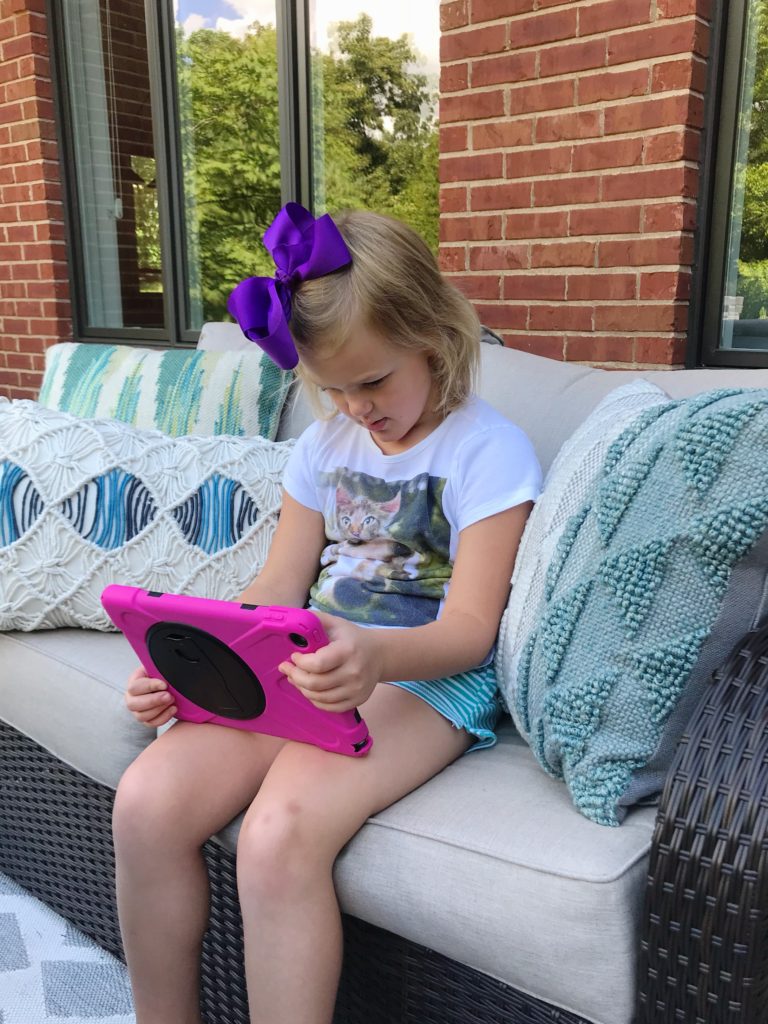
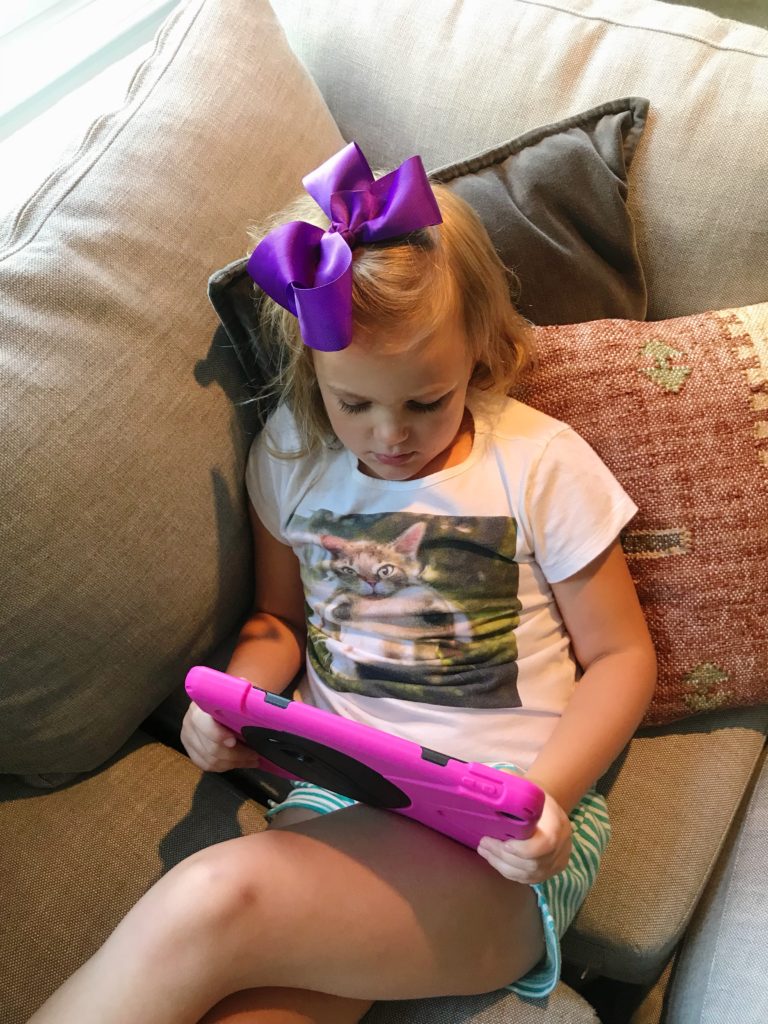
My iPhone is also used to keep my kiddos entertained while waiting at doctor appointments and my oldest two kiddos have their own iPads that they use to watch videos and play games.
I know these lists of how we use our iPhones and iPads sounds like a lot, but I bet you use your phone quite a bit. In fact, I bet you’re reading this post on your phone right now 🙂
And I do want to add we monitor how much screen time our kids get, so take it easy on me.

But I will admit, I don’t monitor everything they watch on their iPads or on my phone. I would like to say I sit down next to them every time they are in front of these electronic devices, but unfortunately it is just not realistic.
So, you know what was a jaw dropping moment for me a while back?! Learning that the iPads I allowed my sweet, impressionable kiddos to play on come with the factory settings set to allow “Explicit” content. Meaning they can watch, see, and interact with explicit material. The settings don’t come in a “PG” mode like I assumed they did. Ugh. You know what they say when you assume something.
Since I obviously needed to put some safeguards into place, I watched a few videos and realized it was simple enough. And since then, I have told a few other moms about how to put these preventative measures into place and figured it was definitely worth sharing with all of you.
So grab all of those iPads and iPhones and learn how to enable restrictions on your kids’ iPhones or iPads (and remember, this isn’t just for little kids. Big kids and teenagers need these measurements put in place too!)
Steps to Enable Restrictions for iPhones or iPads
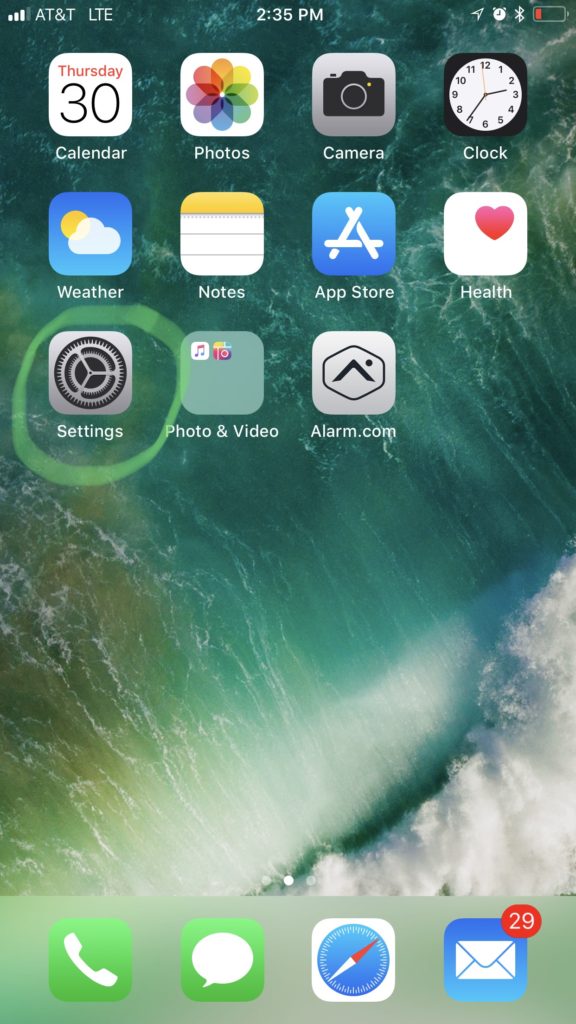
Step 1: Go to Settings.
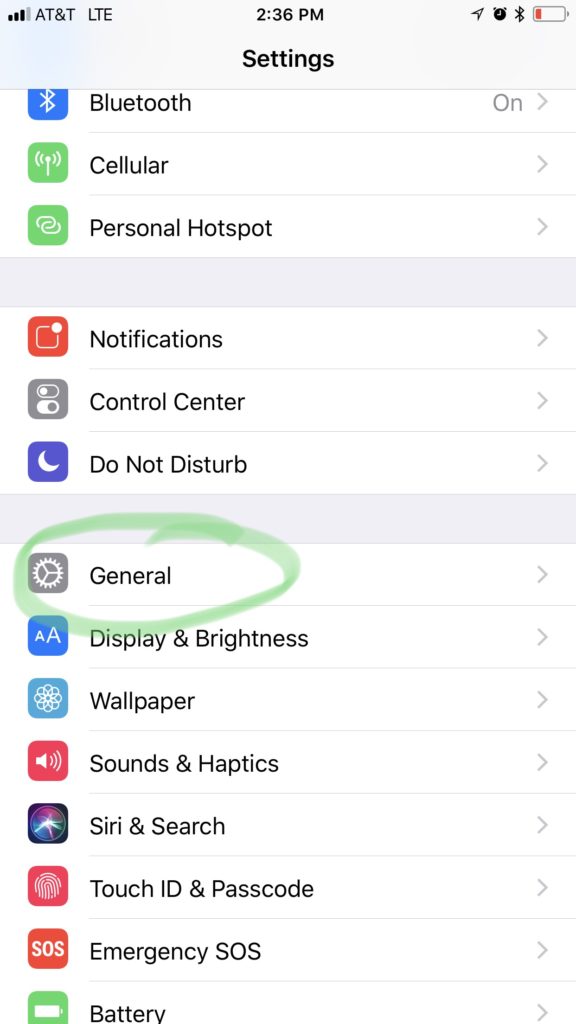
Step 2: Click on General.
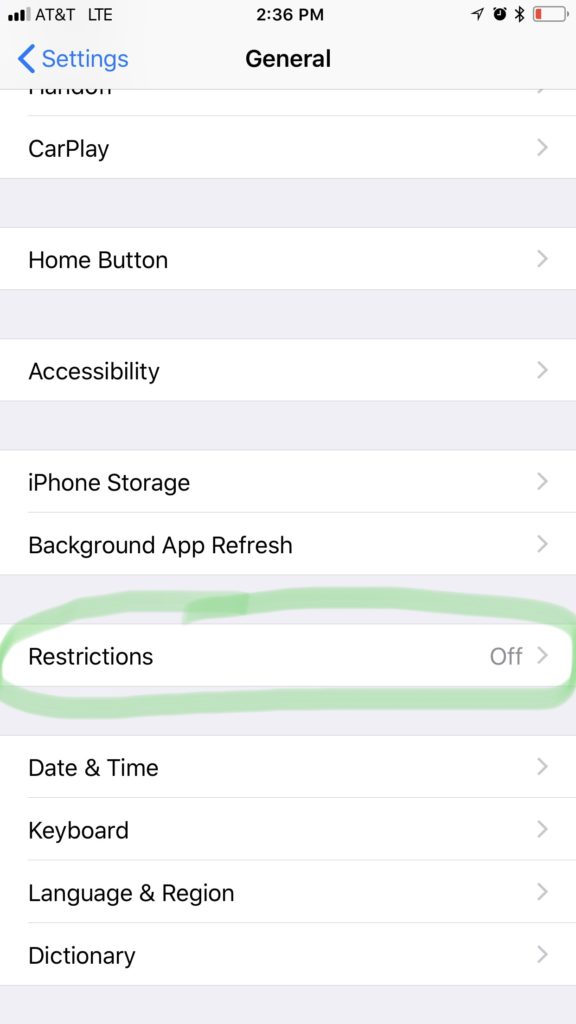
Step 3: Go to Restrictions.
Step 4: Select Enable Restrictions.
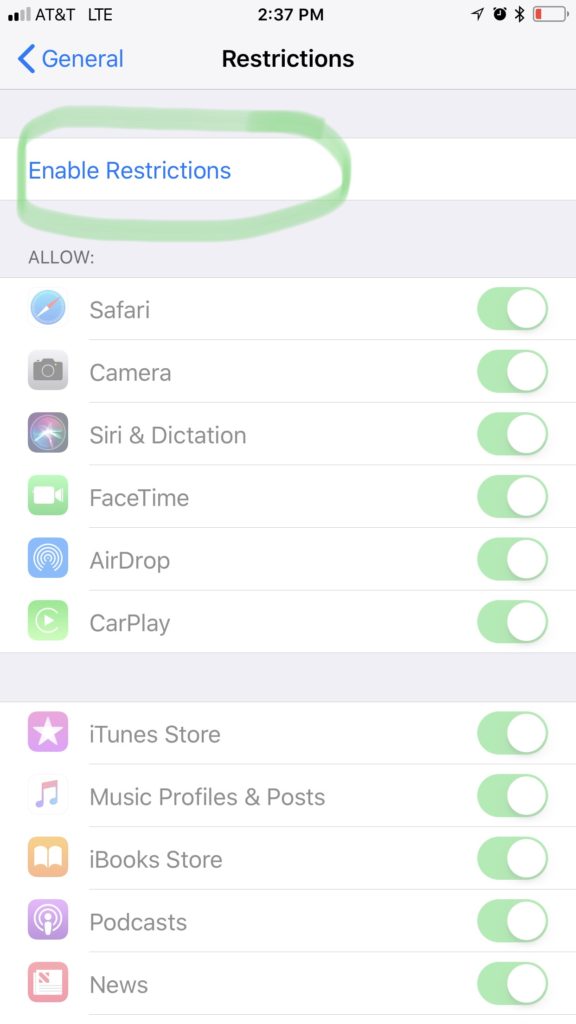
Step 5: Enter a Restrictions Passcode. This can be any code you want but should be different than the passcode used on the phone’s lock screen.
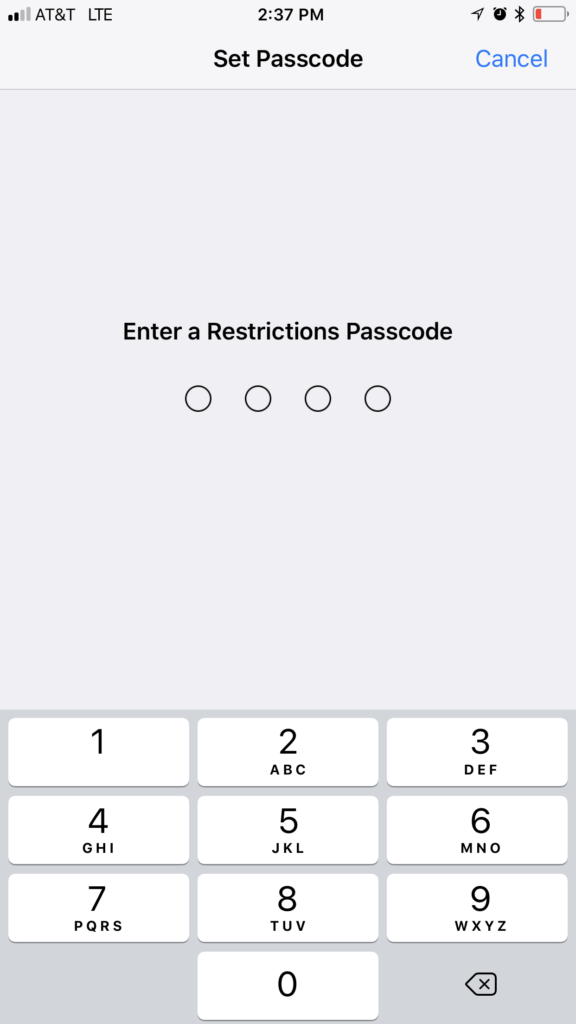
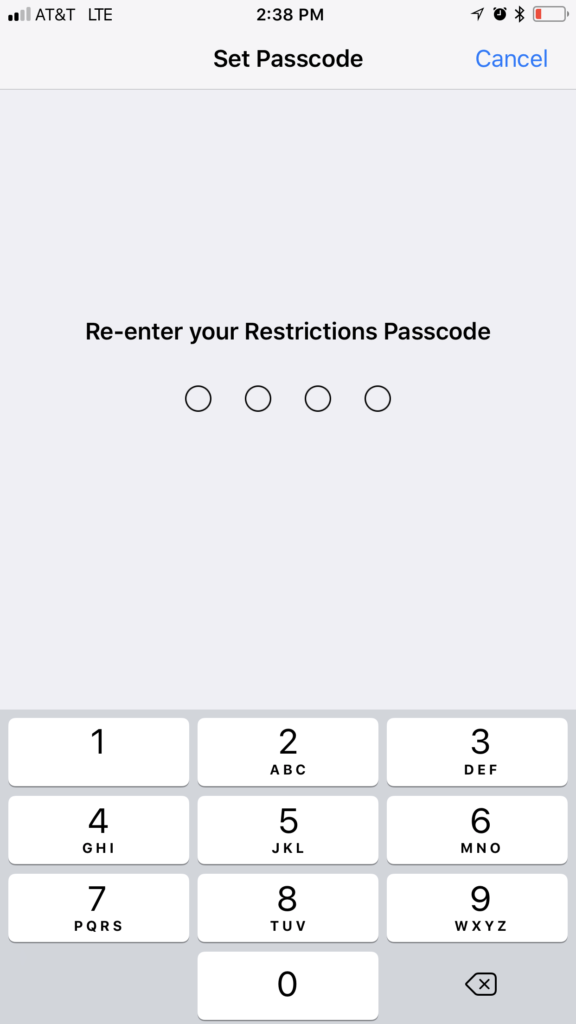
Step 6: Re-enter the Passcode.
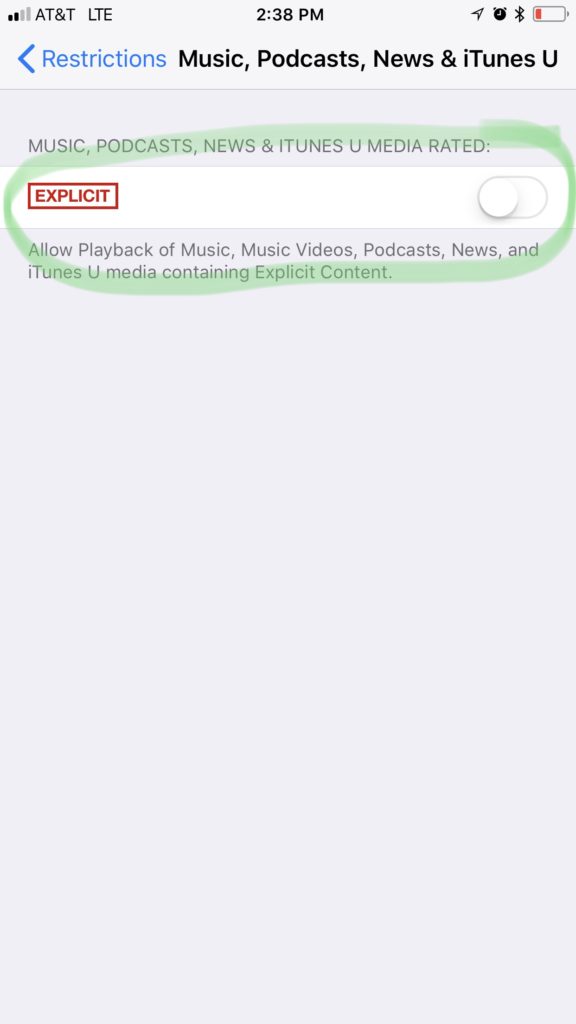
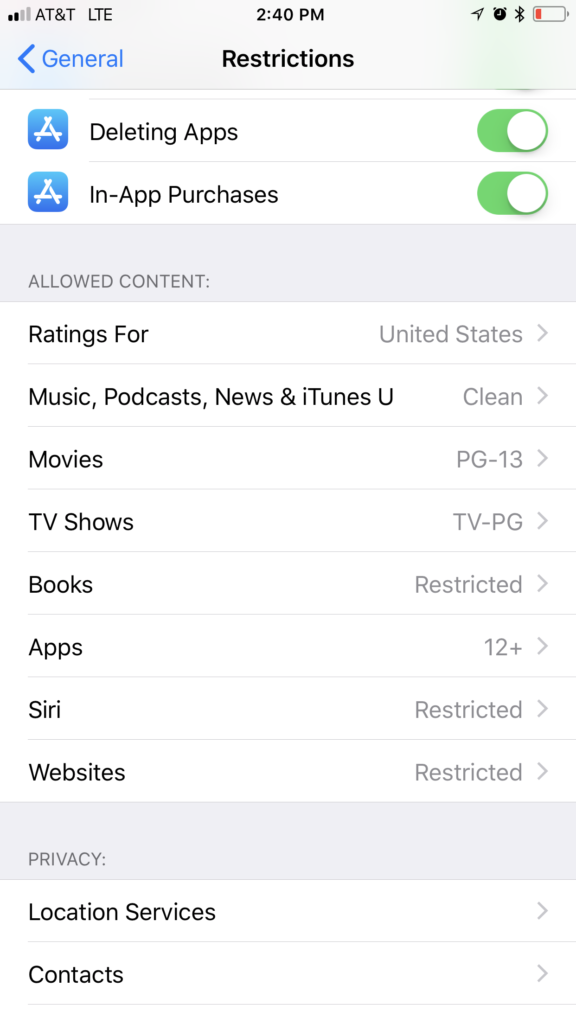
Step 7: Scroll down until you get to the Allowed Content section. This is where you get to customize. Start with the Music, Podcasts, News & iTunes U tab. Click into it and unselect Explicit.
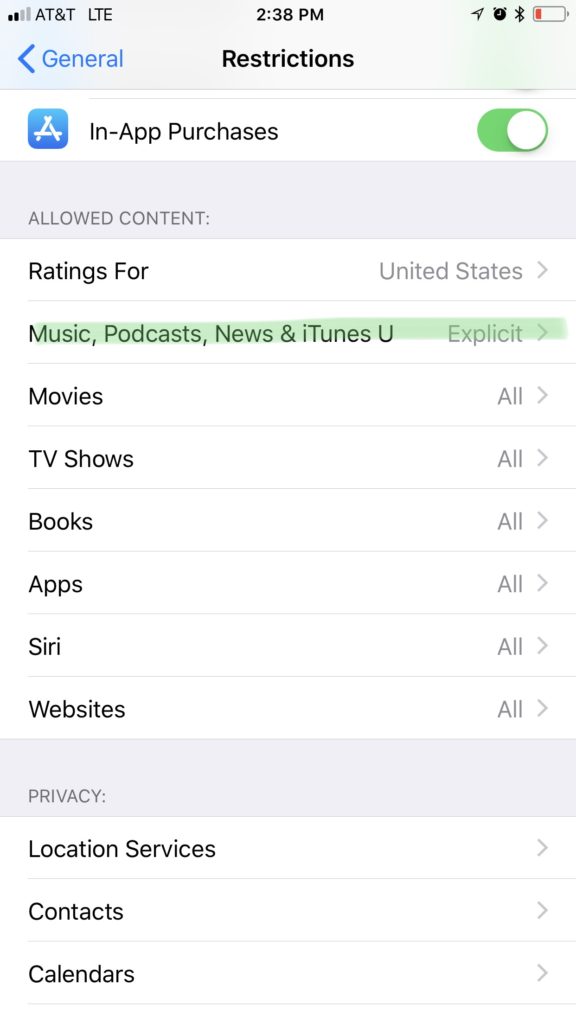
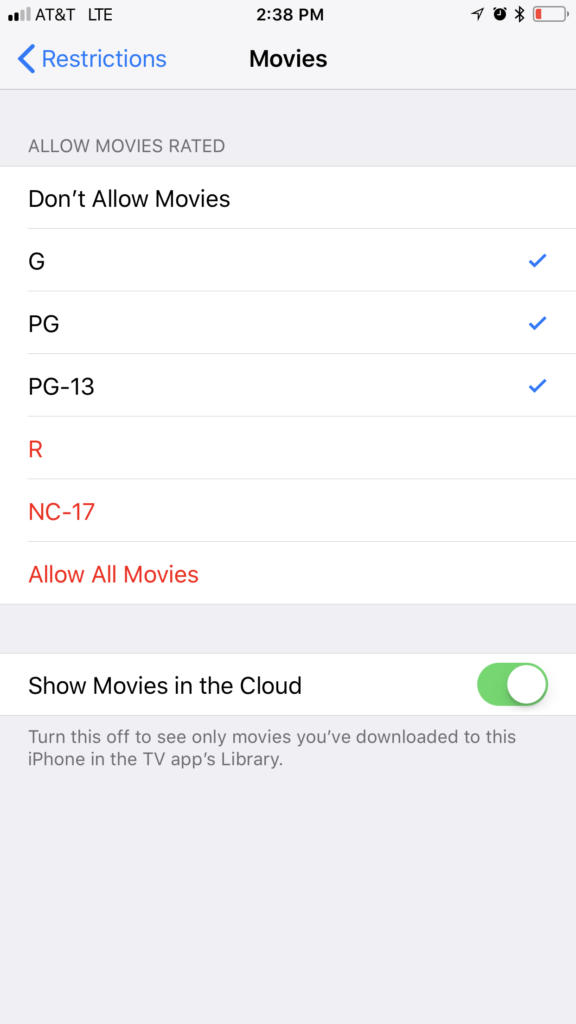
Step 8: Then go back to the previous screen and work your way down the Allowed Content list changing the restrictions based on what you want for your kids. Next is Movies.
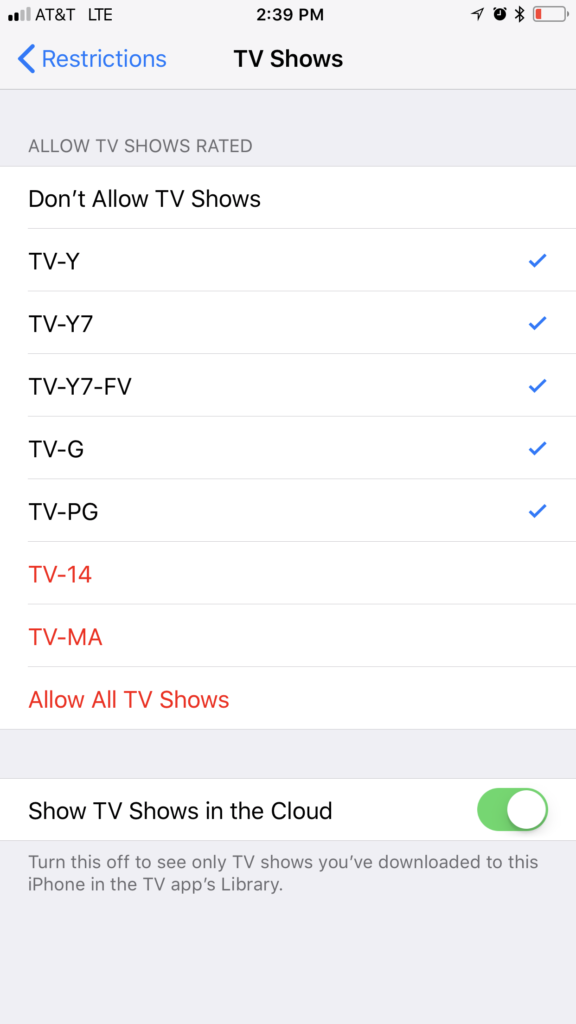
Step 9: Then TV Shows.
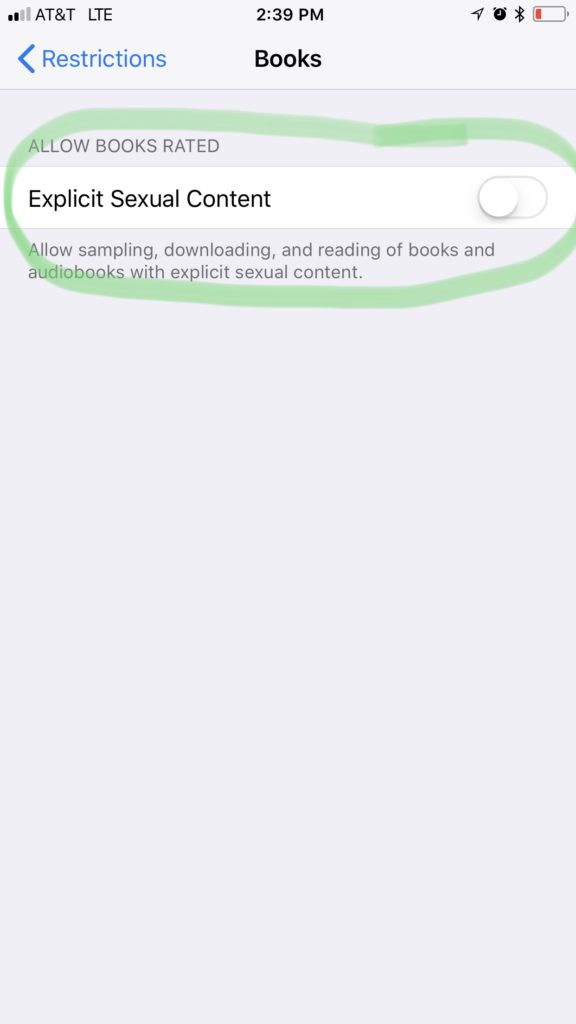
Step 10: Next is Books. Unselect Explicit Sexual Content.
Step 11: Then Apps.
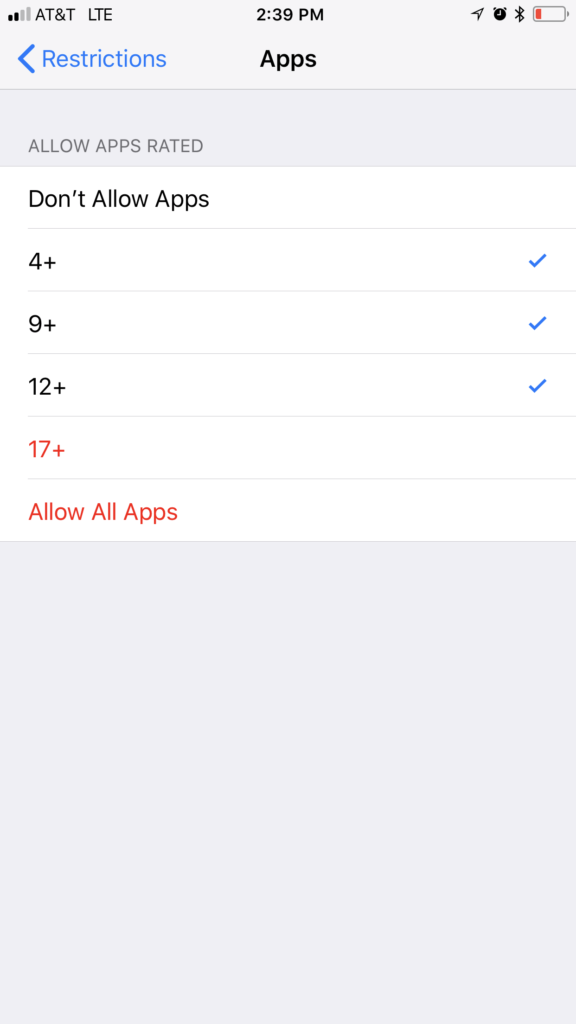
Step 12: For Siri, I unselected Explicit Language.
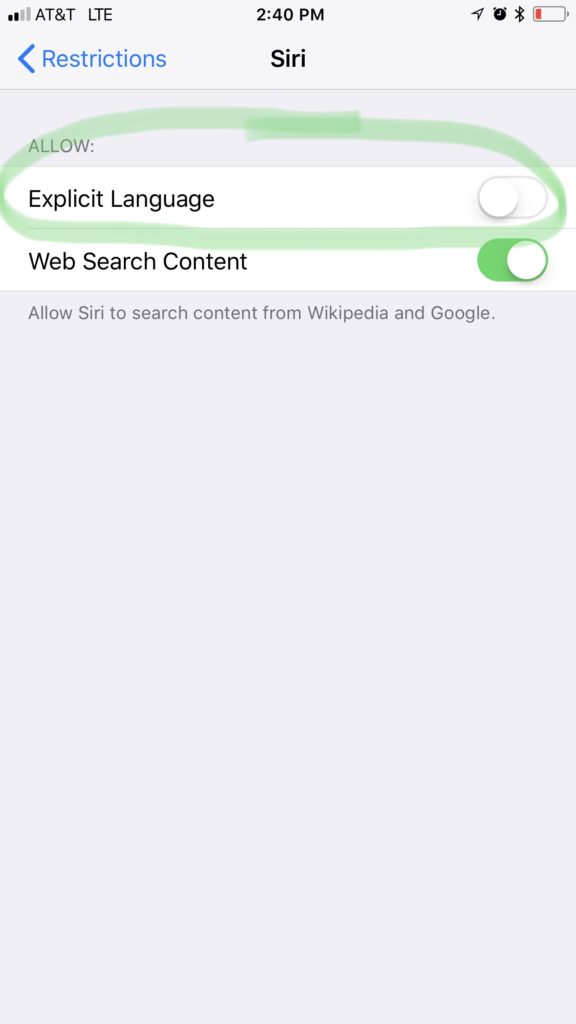
Step 13: The last tab is Websites. Depending on your kids’ ages, you could select Specific Websites Only and enter certain websites you only want them allowed on such as PBS kids or Disney, or you could select Limit Adult Content.
This is what the final Allowed Content section looks like for my son.
I hope this helped and gives you a little more peace of mind. Also, if you have a different device outside of iPhones and iPads, you can easily find how-to videos online.
Disclaimer: I am not an expert on iPhone or iPad safety. This post is simply to provide a tutorial on enabling restrictions on iPhones and iPads for kids. Please always monitor your child’s device usage.
